How to Design a Pull-Up Banner That Actually Stops People Walking Past
Table of Contents

Strolling through a packed London trade show or a bustling retail market exposes a pretty boring pattern. Most corporate exhibition boards look the same, creating a blurry sea of generic marketing shapes that people ignore completely. When we assemble large format displays for our independent clients down at Exact Print, we spend a lot of time analysing what actually forces a walking person to pause, look back, and connect with a brand.
Constructing a high-impact roller banner demands a smart layout plan. It needs to work with how human eyes scan graphics while on the move. We want to show you the simple structural setups that turn a basic silver metal stand into an absolute customer magnet.
The Golden Rules of High Impact Exhibition Design
Placing Your Core Message at Eye Level
The top third of your vinyl sheet canvas is your absolute prime real estate. People always read things from top to bottom, obviously, so your absolute biggest offer needs to sit right where eyes land naturally.
• The Main Logo: Put your company emblem right near the very top peak so crowds spot your name from across the room.
• The Single Message: State your core service or big promotion in huge, high-contrast block lettering.
• Avoid the Floor Zone: Push all your important details completely out of the bottom 50cm because low text gets hidden behind table legs and walking feet.
Working with Simple Content and High Contrast
Trying to cram twenty different bullet points onto a single portable stand completely ruins its strength. People usually spend maybe three fast seconds glancing at a sign while walking, so your wording needs to stay incredibly brief.
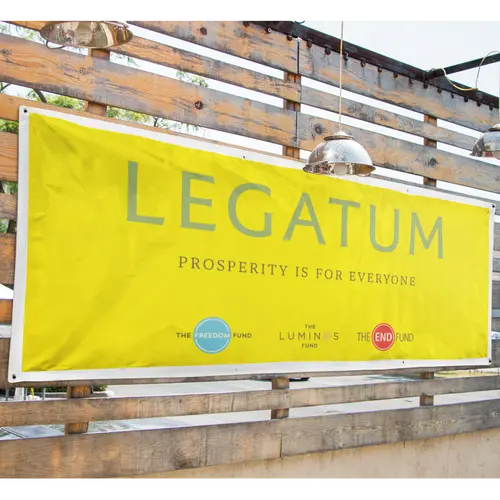
Stick to a tiny, basic colour palette that pops hard against dark exhibition hall walls. If your vinyl background is bright white or crisp cream, use heavy black or dark indigo fonts. A messy, chaotic background image makes small text totally unreadable, so people just walk away out of annoyance.
Using High Density Photography
A tiny photo saved directly from a social media profile will look completely blocky and pixelated when stretched onto a two-metre tall frame. Fuzzy graphics instantly make a business look amateur.
We always tell people to save photographic files at a bare minimum of 150 DPI at the real, full-size scale. Vector graphics are even better, honestly, because they stretch up infinitely without losing a single bit of sharpness.
A Quick Structural Checklist Before Printing
Before you save your final file and send it over to the Exact Print dashboard, run through these fast checks:
• Watch the Borders: Keep your text blocks 50mm away from the top trim line and 150mm away from the heavy bottom roller mechanism.
• Drop One Contact Link: Slam a single, massive web address or a clean social media tag right near the middle section.
• Stick to Two Fonts: Use a maximum of two font families to keep your presentation looking clean and tidy.
The Secret to Getting Noticed Instantly
Spending time on a spacious layout makes your setup look premium and pulls in genuine foot traffic. Our team over at Exact Print uses heavy, scuff-resistant plastic materials and rich, non-fading inks so your frame stays fresh through months of travel.
By combining sharp colour contrast with dense, clear pictures, your point stays perfectly readable from a distance. Bring us your layout files today, and we will build a stand that cuts through the noise.


